Video output the web
Follow these steps to convert your QuickTime movie to the more web-friendly Flash video format.
- In Final Cut Express, choose File > Export > Using QuickTime Conversion... > Use > Broadband - Medium. This will create a QuickTime file with the .mov extension.
- Open Flash Video Encoder from the Mac's Applications folder.
- Drag the video file exporting in step 1 to the file queue window in Flash Video Encoder.
- Start with the default settings, then judge the resulting file size and video quality to determine whether you are done or your need to adjust for smaller file size or better video quality.
You now have a Flash Video file (.flv) and need to package it for presentation on a web page.
- Place your Flash Video file inside the folder that your Dreamweaver site is set to use.
- In Dreamweaver, open a new or existing web page.
- Choose the Insert menu > Media > Flash Video...
- Leave "Video type" set to "Progressive download video"
- Choose a skin.
- Click on "Detect size."
- Click OK.
- Dreamweaver has placed additional files in your local web folder. These files will need to be uploaded to the web server for your movie to play from the web.
Upload your movie file and test using a web browser pointing to the published location.
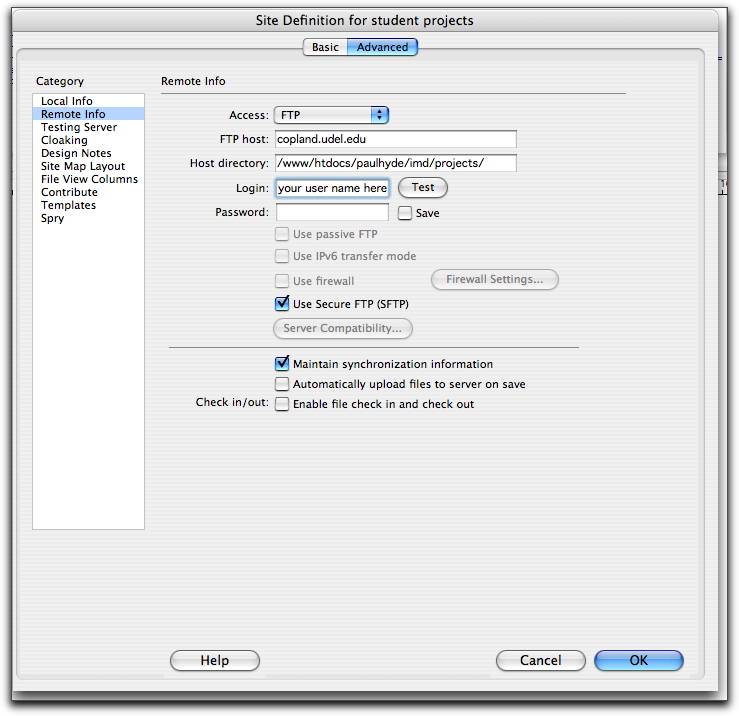
- For this class project, define your remote folder on copland.udel.edu as:
/www/htdocs/paulhyde/imd/projects